> ## Documentation Index
> Fetch the complete documentation index at: https://docs.wavix.com/llms.txt
> Use this file to discover all available pages before exploring further.
# How to port a phone number
> How to transfer your existing phone number to Wavix using the number porting process.
## What is Number Porting?
Number porting (also called "local number portability" or LNP) lets you transfer your existing phone number from your current service provider to the Wavix platform.
The number itself does not change—your customers continue to call or message the same number—but the underlying infrastructure and capabilities do. On the Wavix platform, ported numbers become programmable assets that you can connect directly to your applications, workflows, and AI systems.
## Why port a number to Wavix?
* **Unified Communications**: Consolidate voice and SMS on a single platform.
* **Enable programmable communications**: Route calls to application endpoints, send and receive SMS programmatically, and trigger workflows using APIs.
* **Power AI and real-time use cases**: The Wavix platform enables live call media streaming, allowing you to build AI voice agents that interact live with callers.
## Step-by-step porting process
**U.S. number porting (paperless process)**
This guide explains how to port U.S. phone numbers using a paperless process.
**International number porting**
Wavix supports number porting in 36 countries. Requirements and procedures vary by country.
While this guide focuses on U.S. number porting, reviewing it can help you understand the general porting process in other countries.
For assistance with international porting, contact the Wavix [Porting team](mailto:lnp@wavix.com) or [Support](mailto:support@wavix.com) and include the numbers you want to port. The team will verify number portability and provide the required details and costs.
## Prerequisites
Before you start the porting process, verify you have the following:
### Information you'll need
* **Account Number**: Your current provider's account number for the number(s) you're porting.
* **Billing Phone Number**: The phone number on the account that owns the ported number(s).
* **Service PIN or Password**: A security code from your current provider (usually 4-6 digits).
* **Account Holder Name**: The name registered on the account.
* **Account Address**: The service address associated with the number(s).
### Eligibility requirements
* Numbers must be **active and in use** with your current provider
* The account must be in **good standing** (no unpaid balances that would prevent transfer)
### Step 1: Prepare your current provider account
Before submitting the port request, gather the required information from your current provider:
1. Log in to your current provider's portal or call their customer service.
2. Locate your **Account Number** (usually found on your invoice or account settings).
3. Find your **Service PIN** or Password (if you don't have one, request the provider create one for you).
4. Note the **Billing Phone Number** (the phone number associated with the account itself, not the number being ported).
5. Confirm the **Service Address** on file.
6. Verify that the numbers are active.
### Step 2: Submit the Porting request in the Wavix portal
Once you have the information from Step 1, create your port request:
1. Go to **Numbers** → **Porting**.
2. Select **Create new**.
Review and agree to the porting terms.
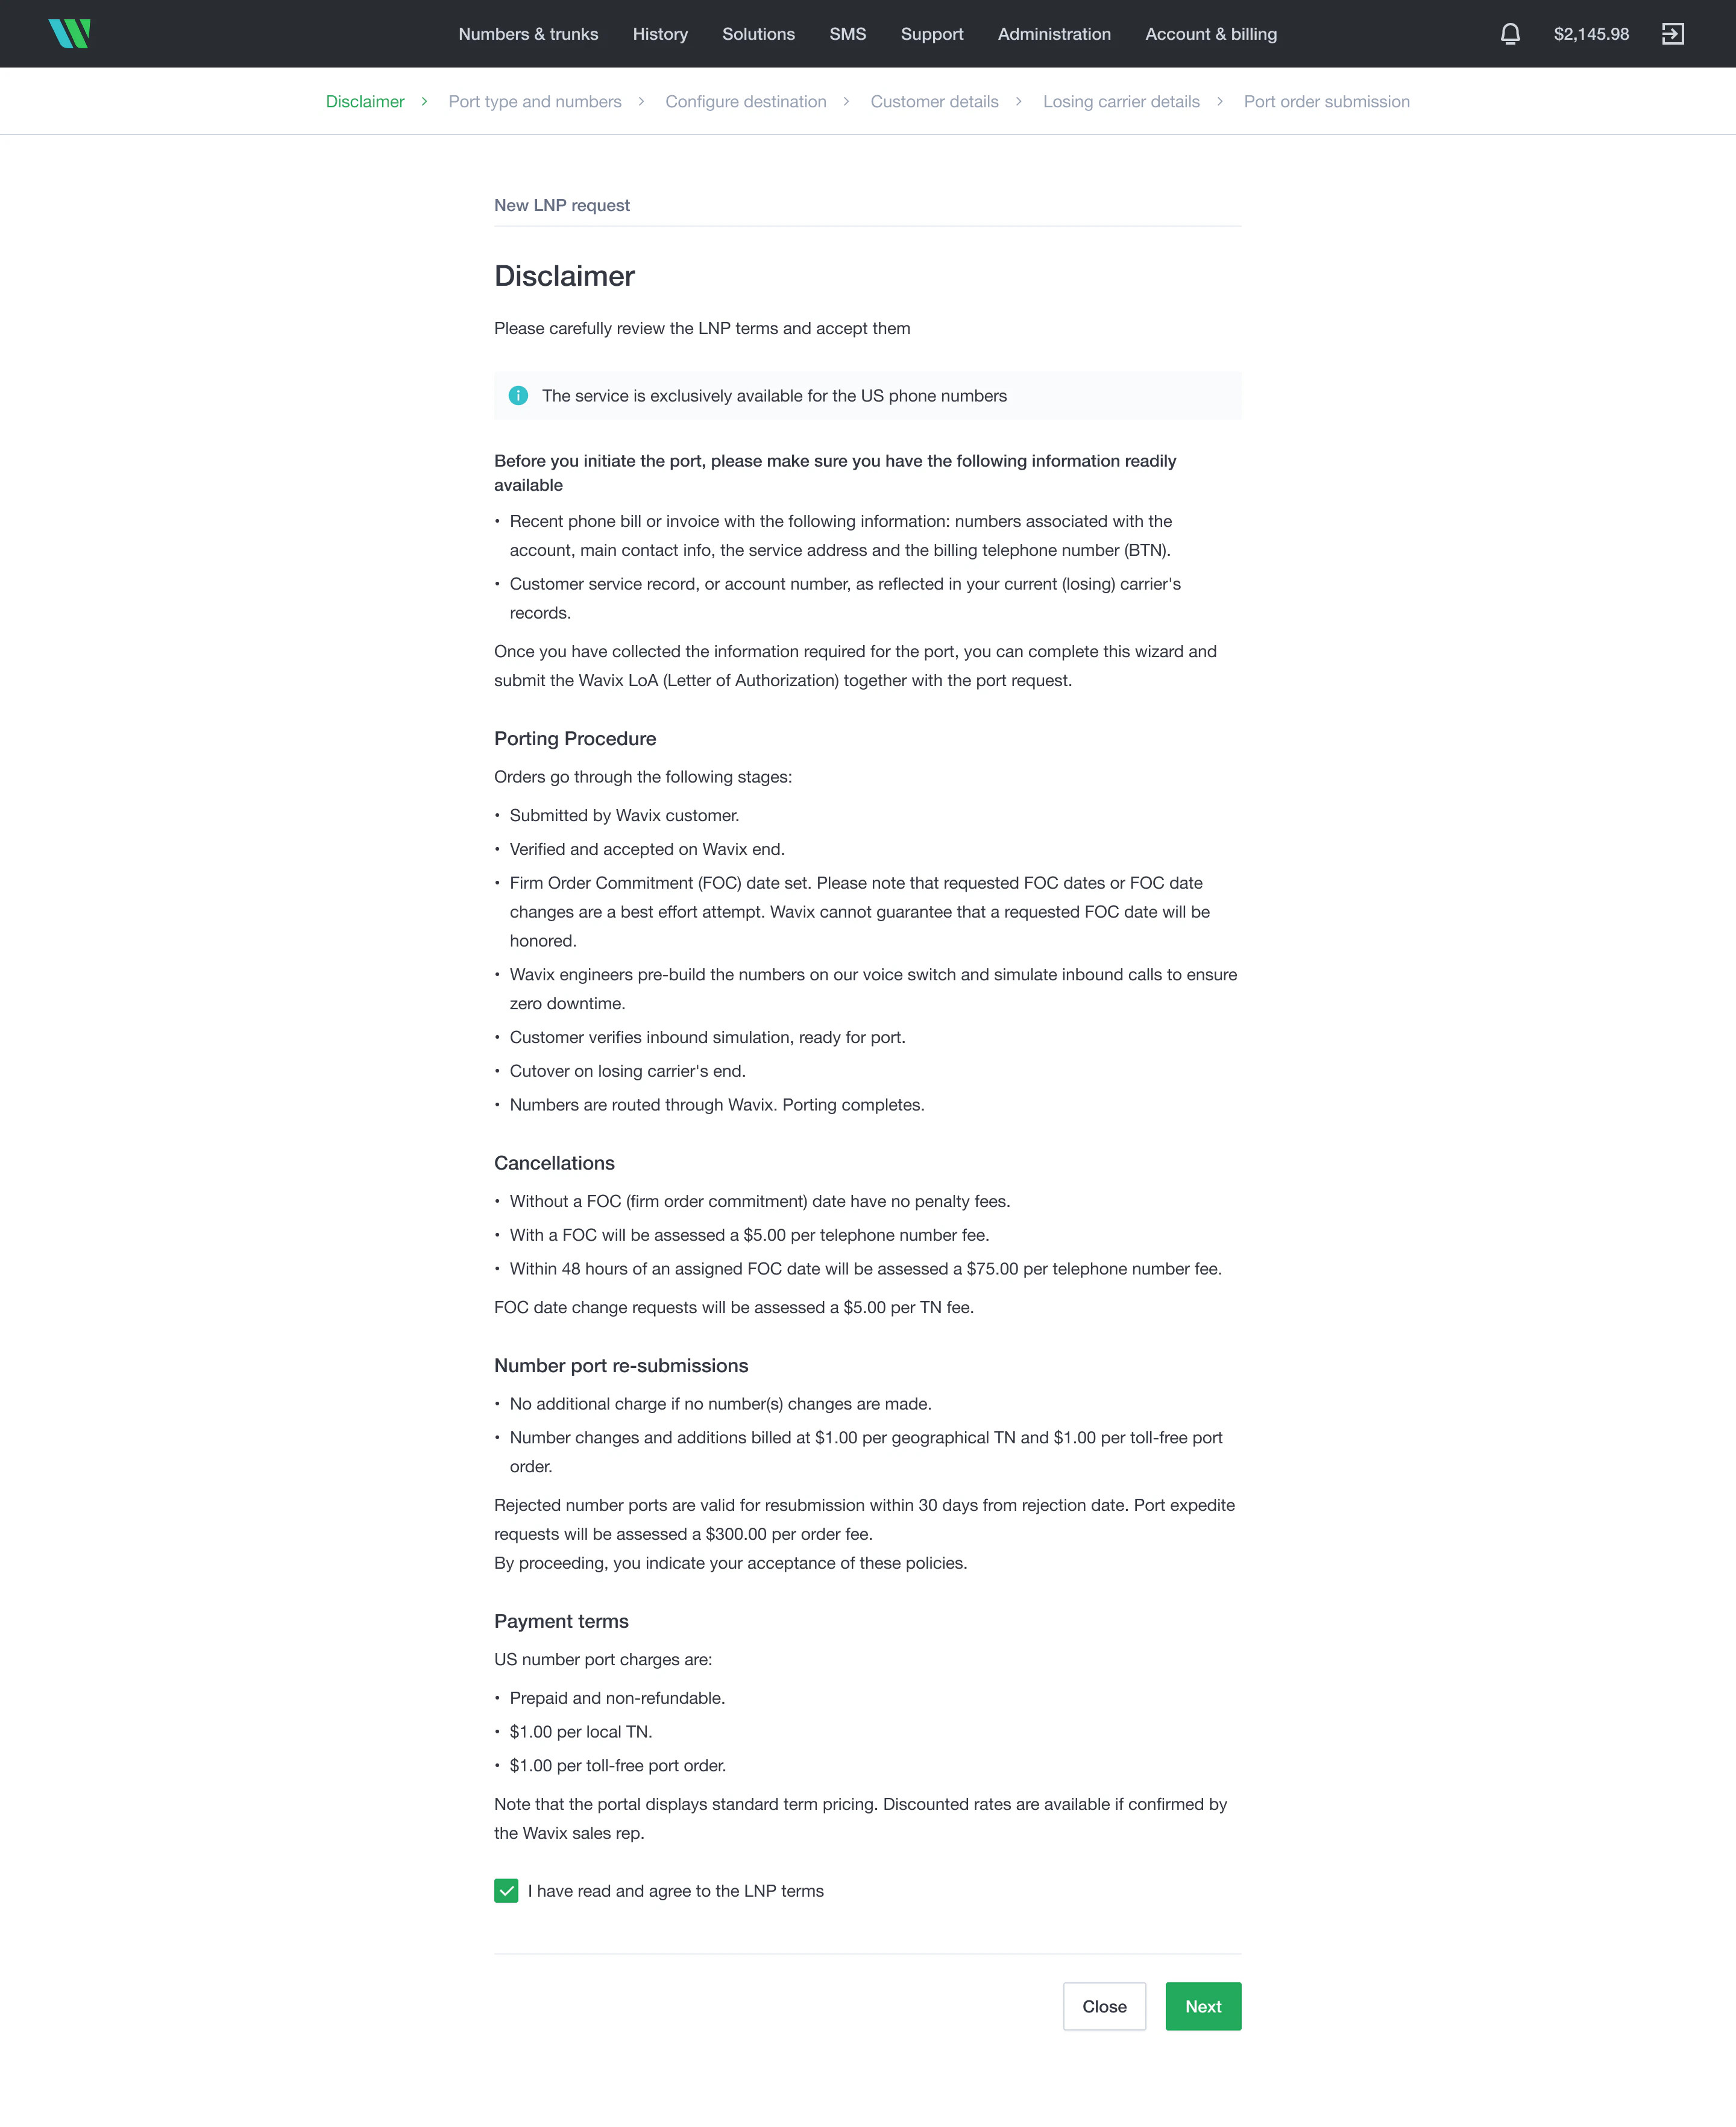 Select **Next**.
Select the port type and enter the numbers to port.
Select **Next**.
Select the port type and enter the numbers to port.
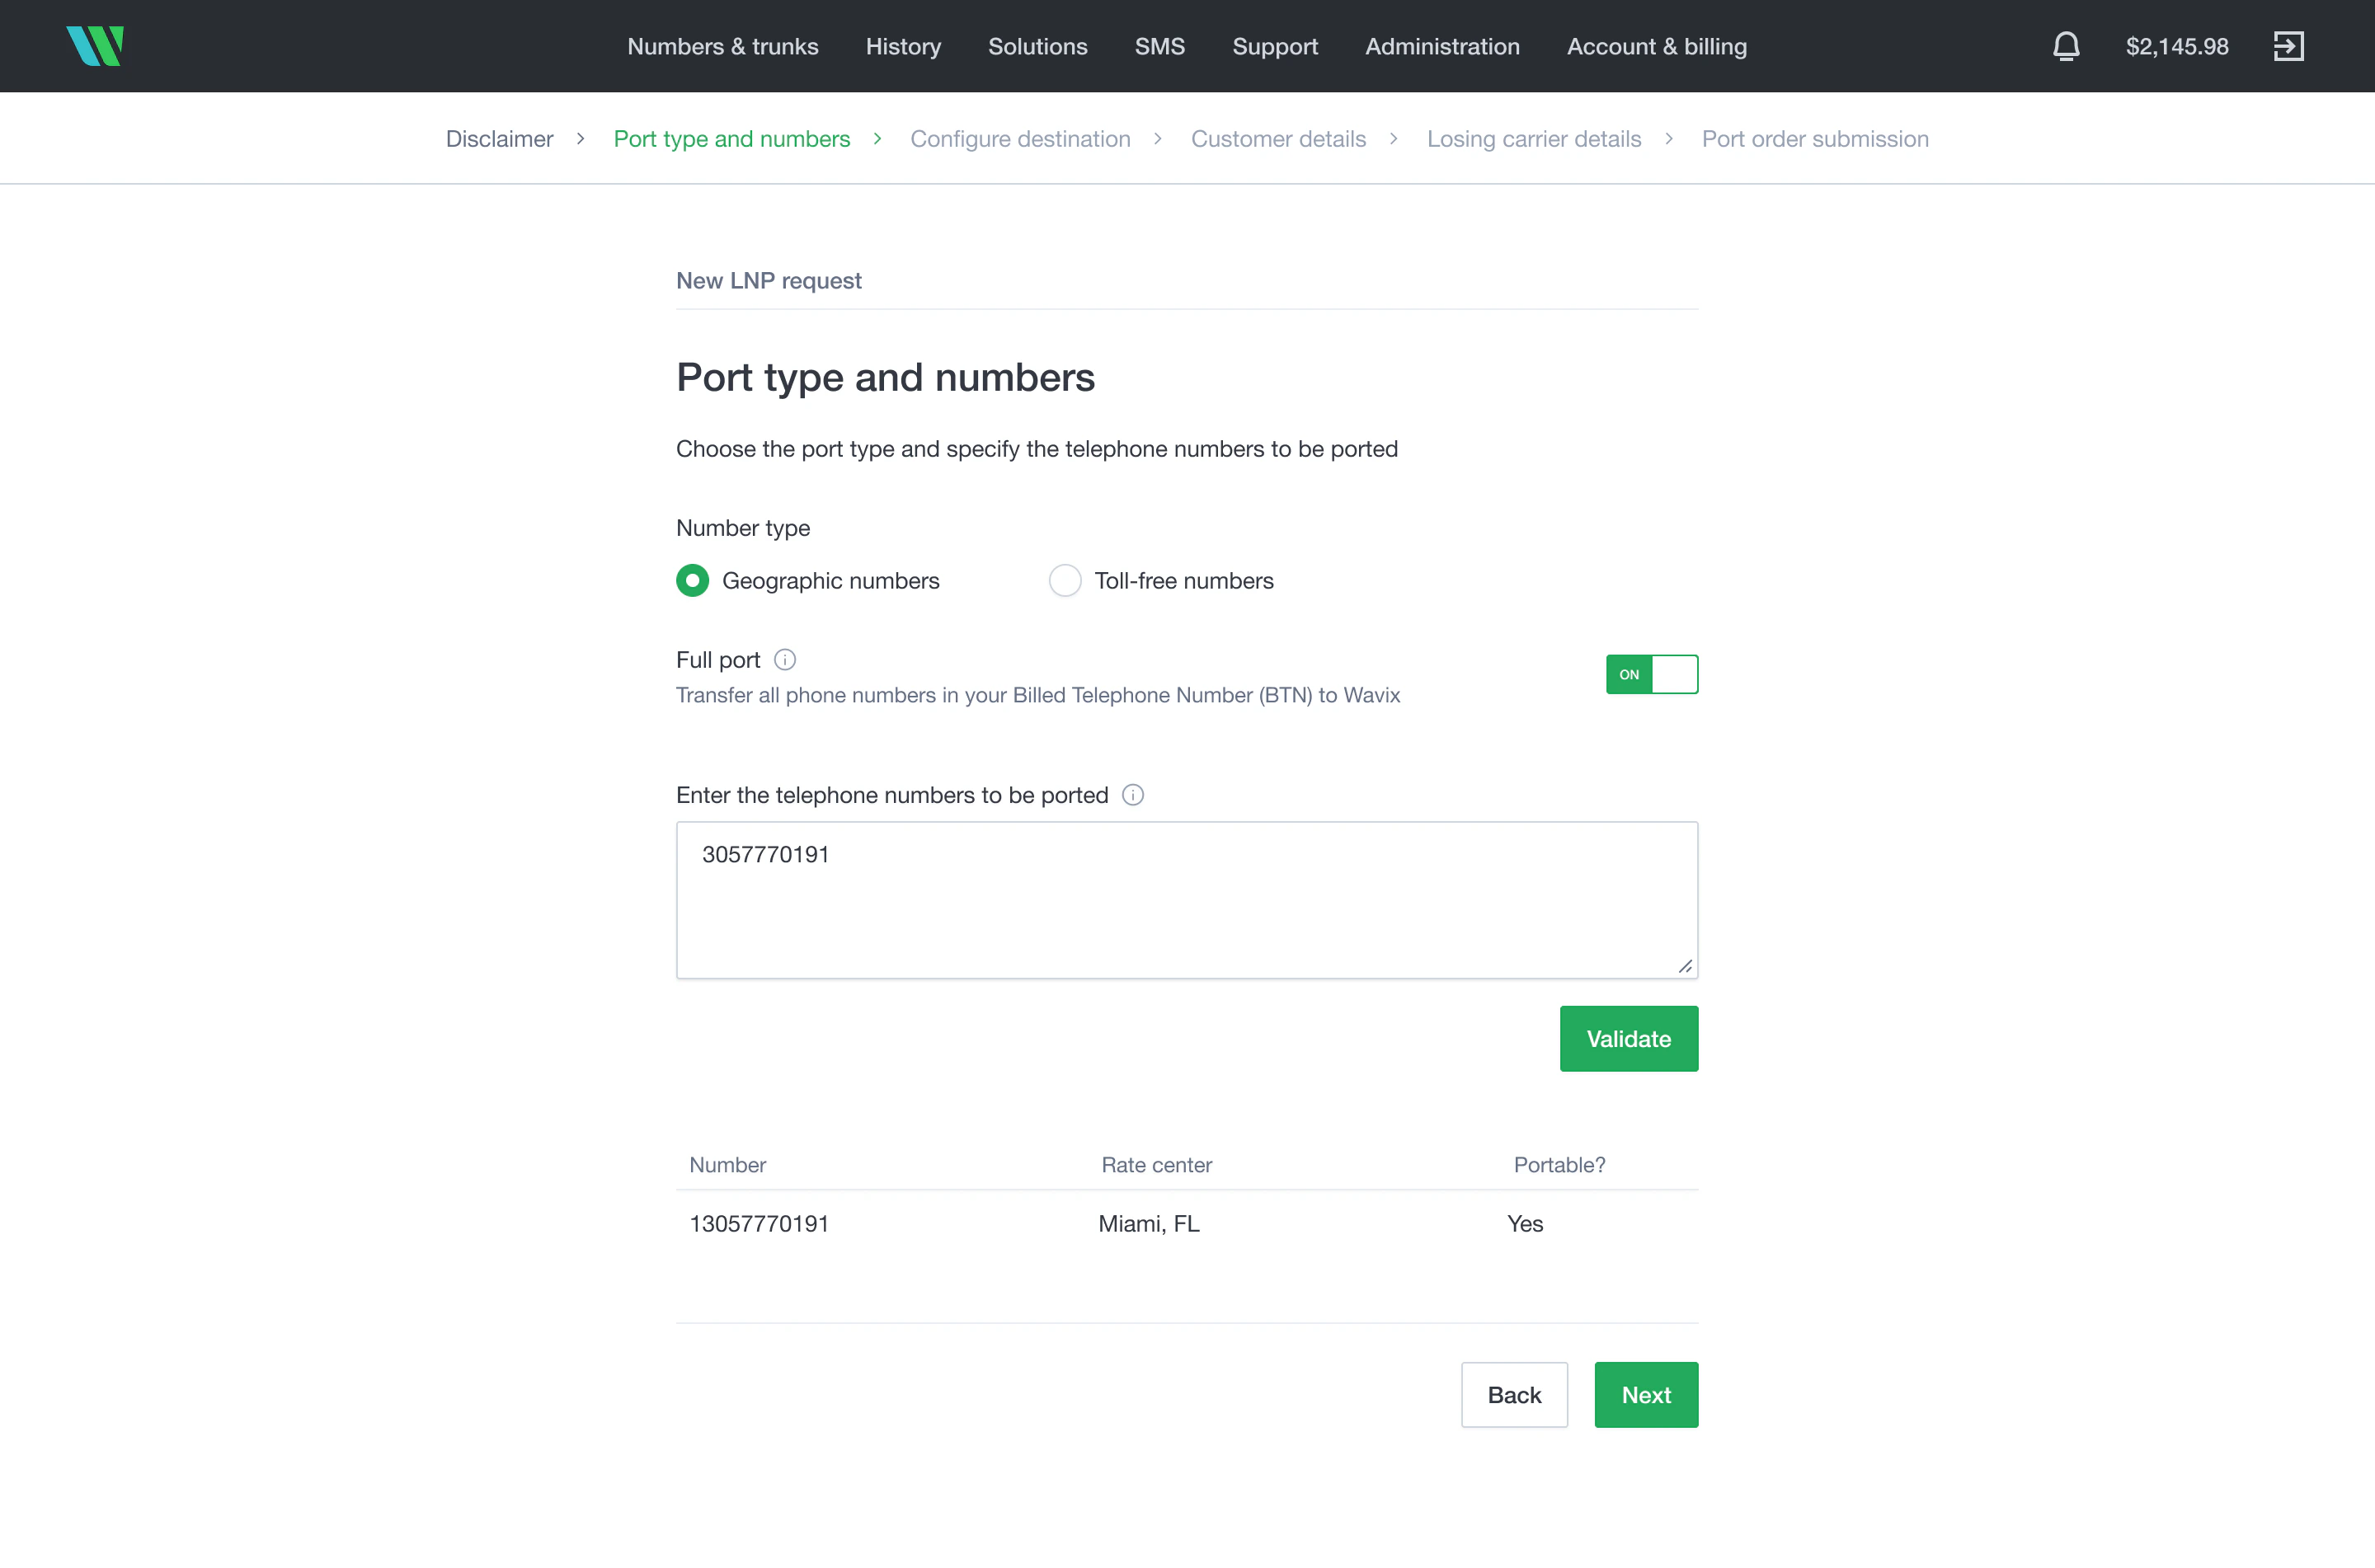 You can enter single numbers, ranges, or both.
Select **Next**.
Optionally, preconfigure inbound call routing for the ported numbers.
You can enter single numbers, ranges, or both.
Select **Next**.
Optionally, preconfigure inbound call routing for the ported numbers.
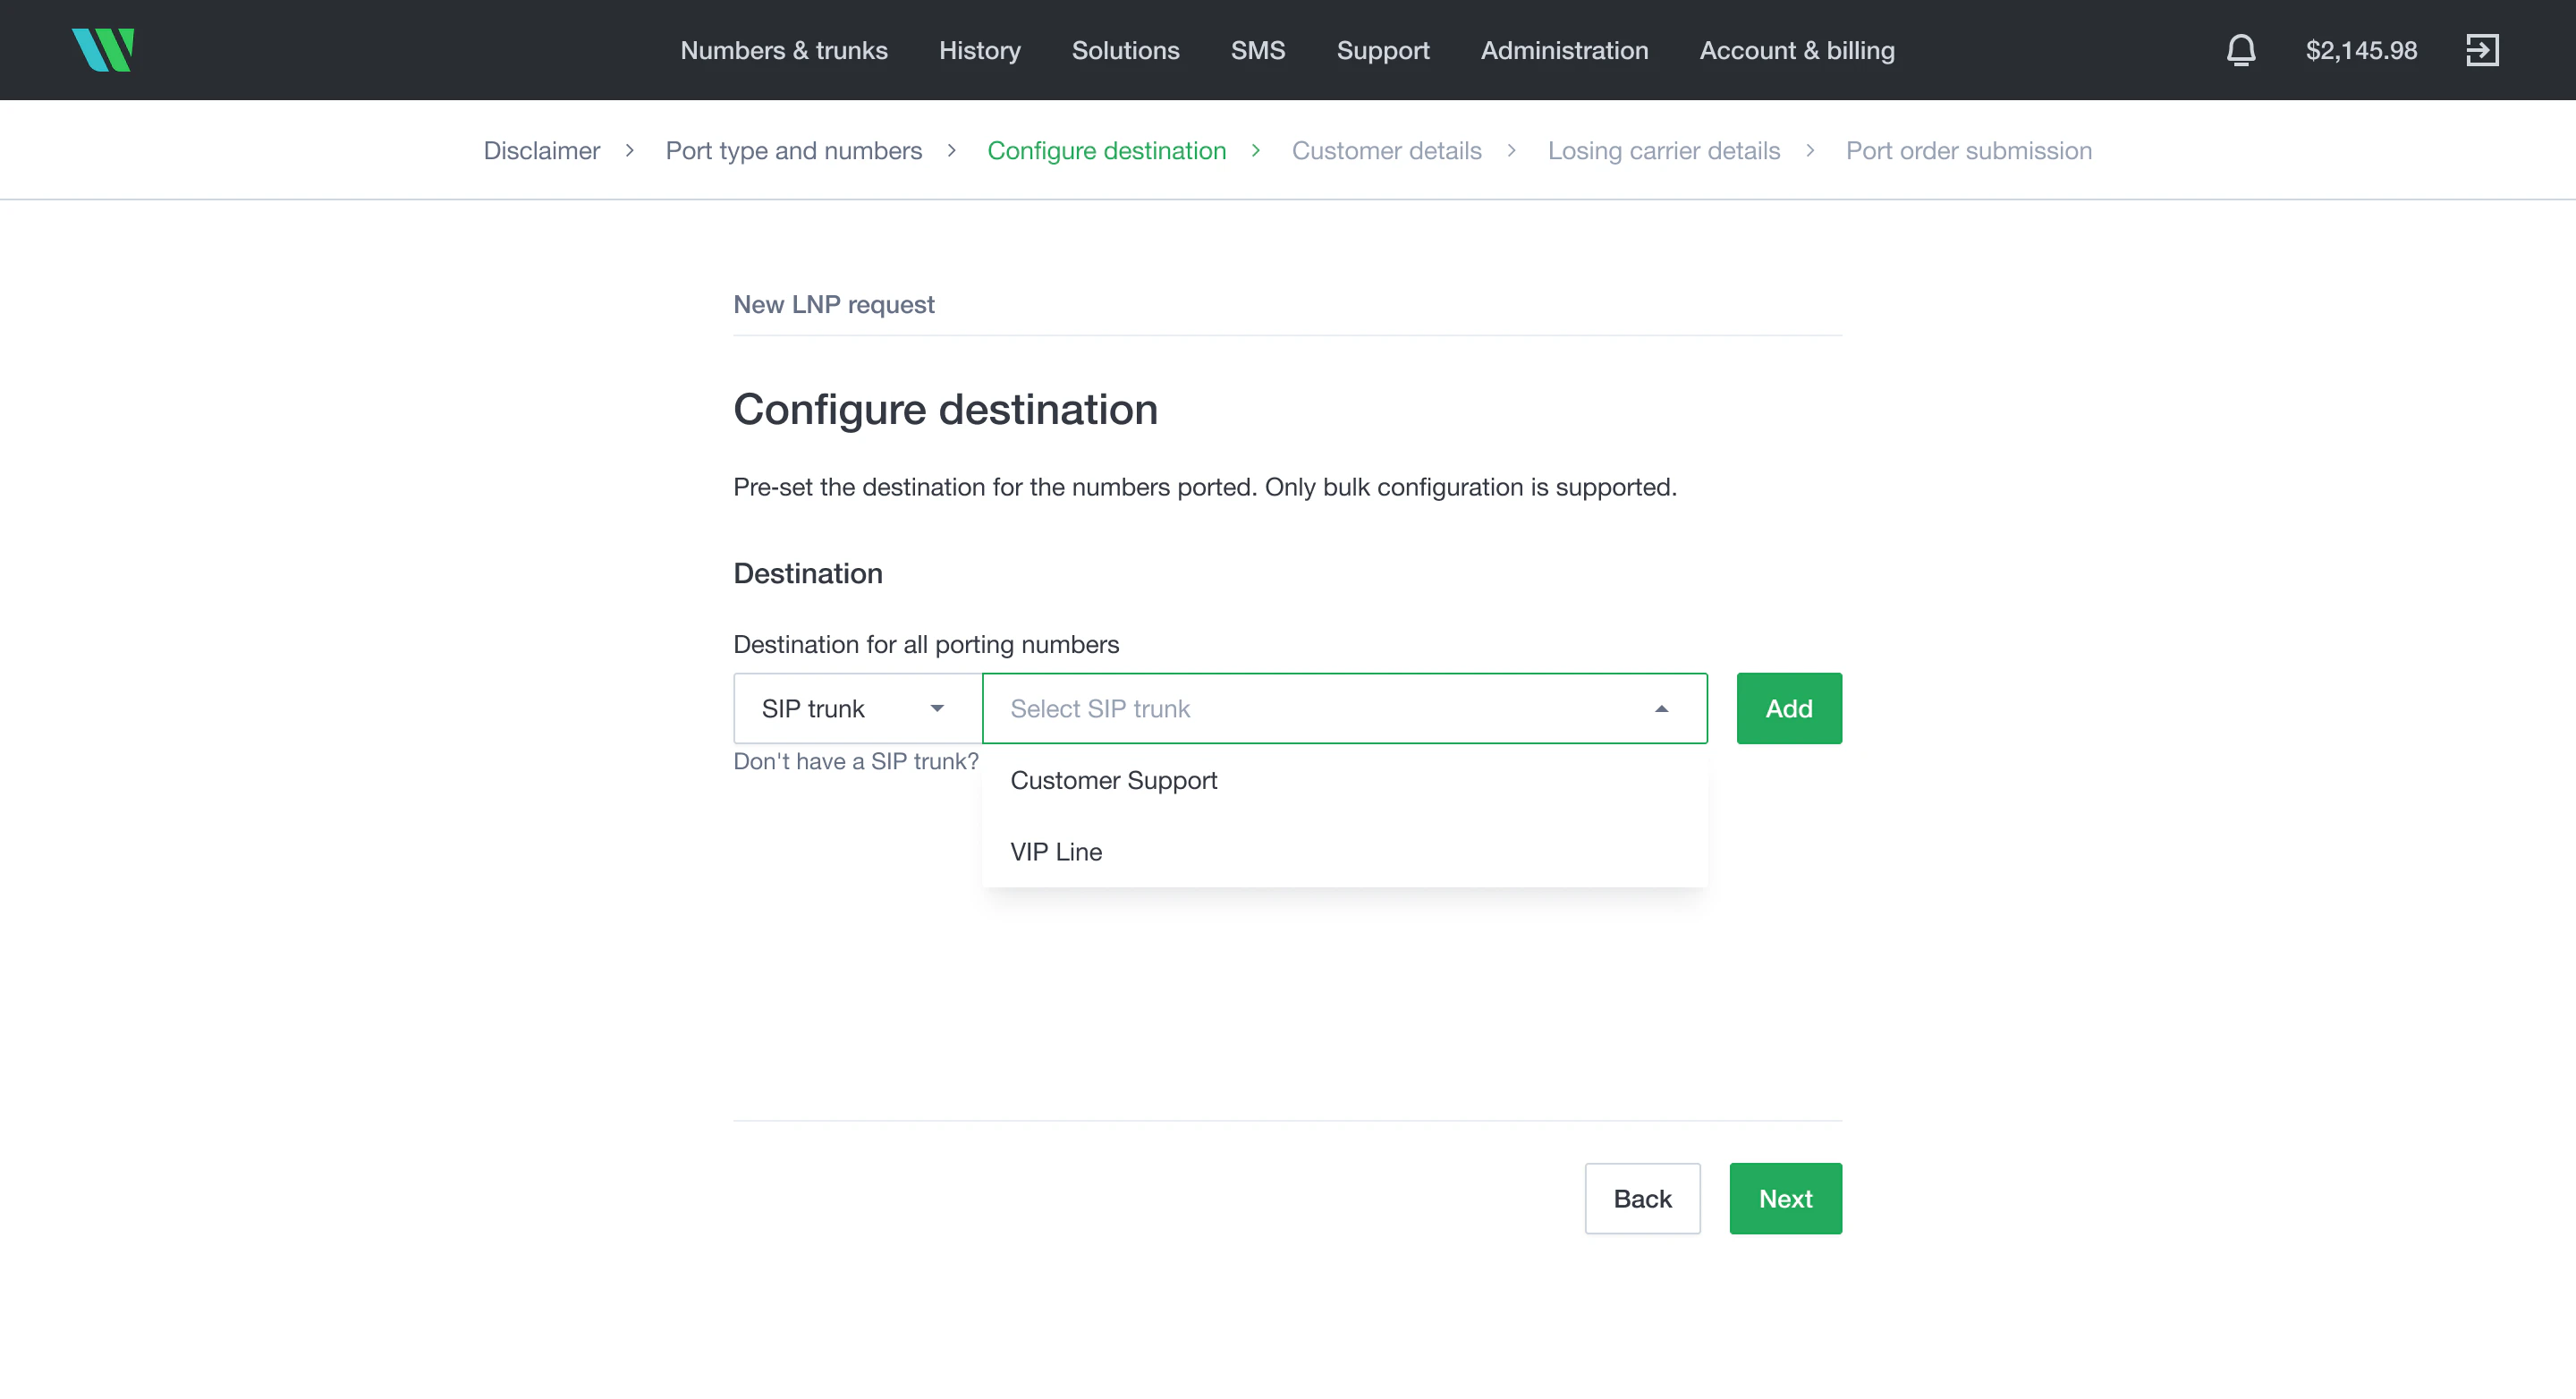 Select **Next**.
Provide your account details with the losing carrier.
Select **Next**.
Provide your account details with the losing carrier.
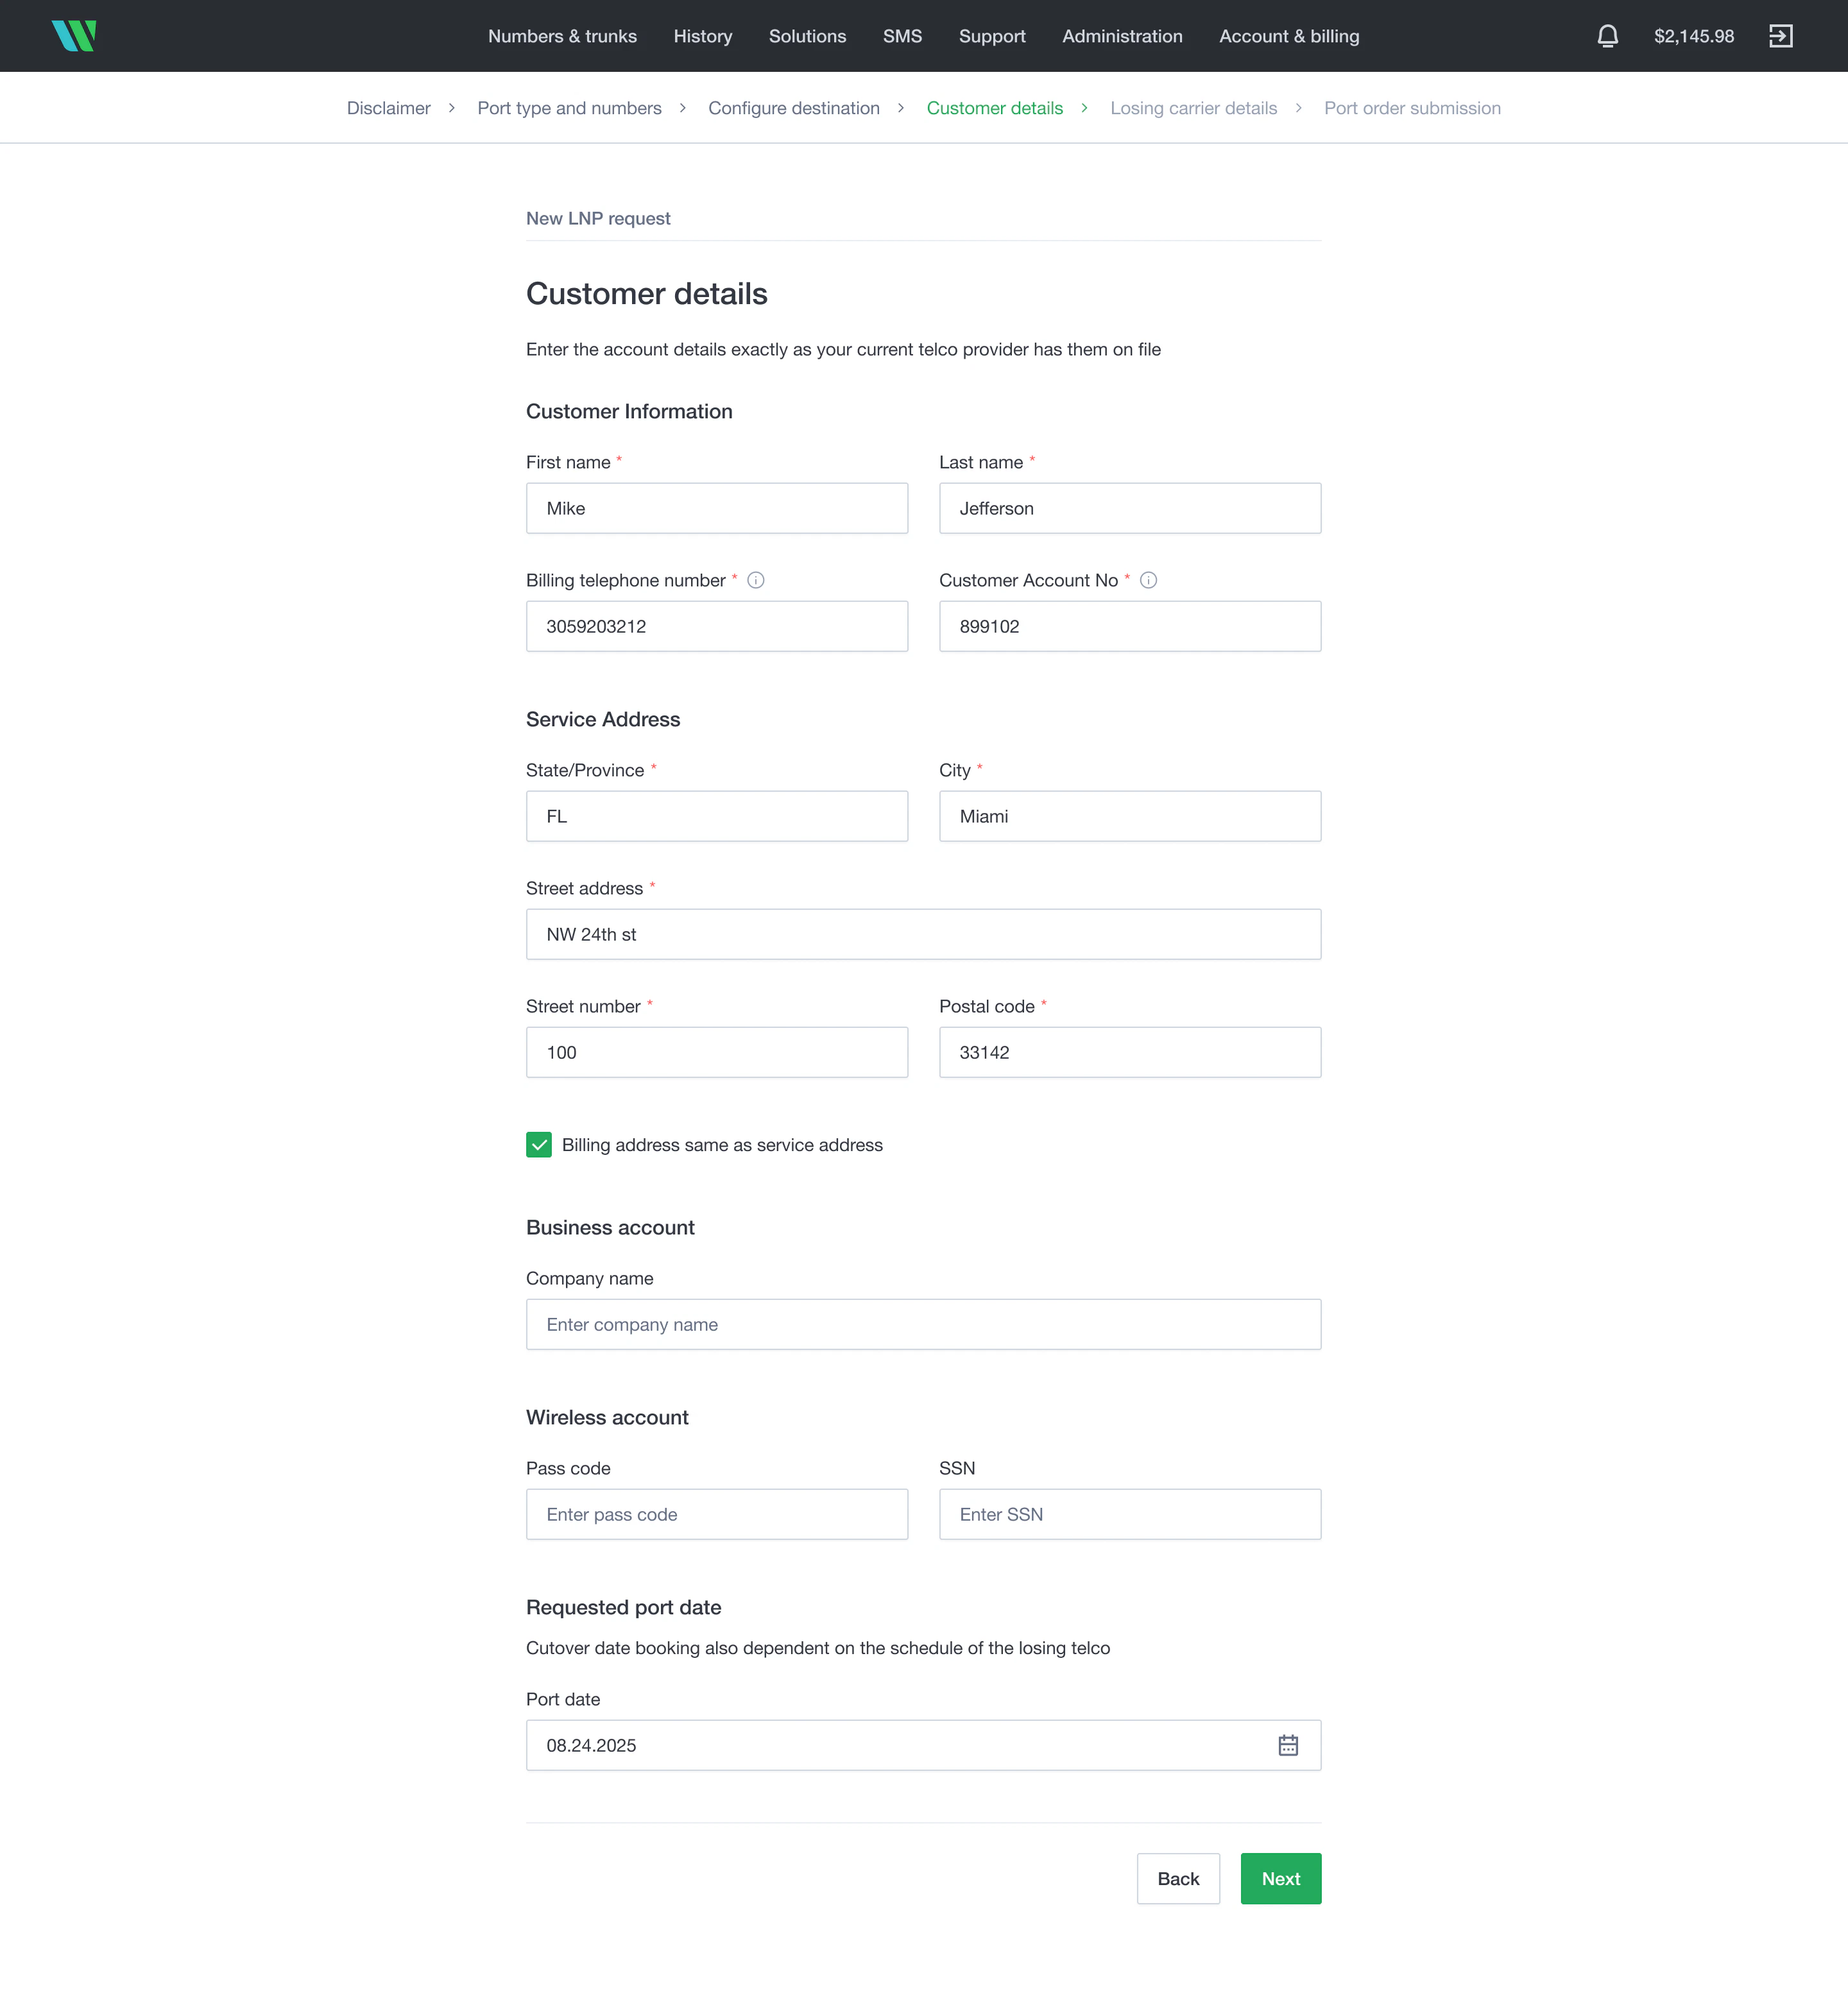 Select **Next**.
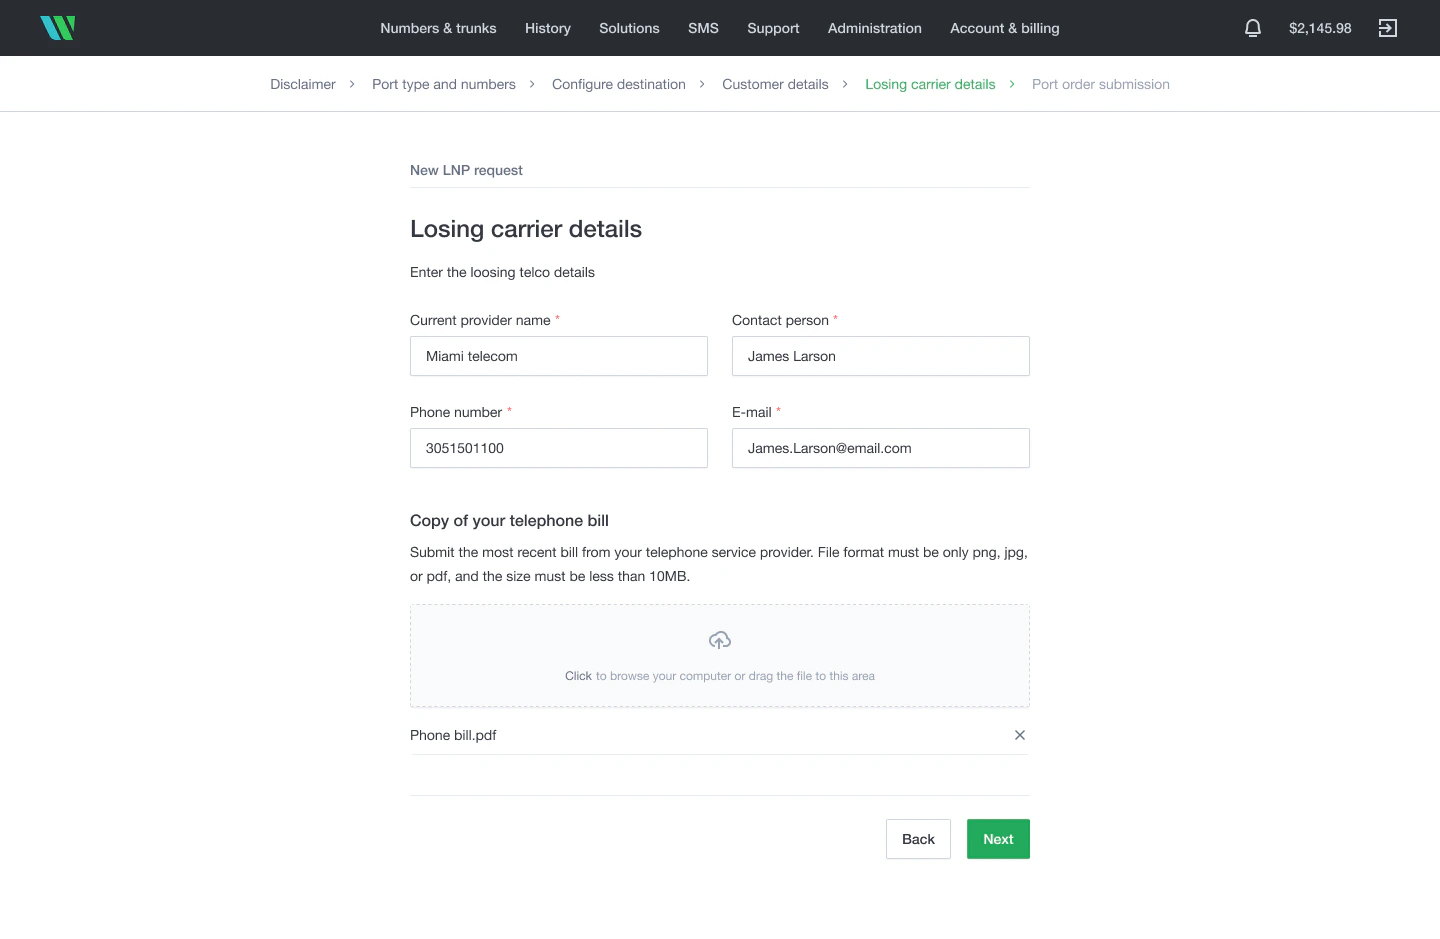
Provide the losing carrier details and upload the most recent phone bill.
Select **Next**.
Provide the losing carrier details and upload the most recent phone bill.
 Select **Next**.
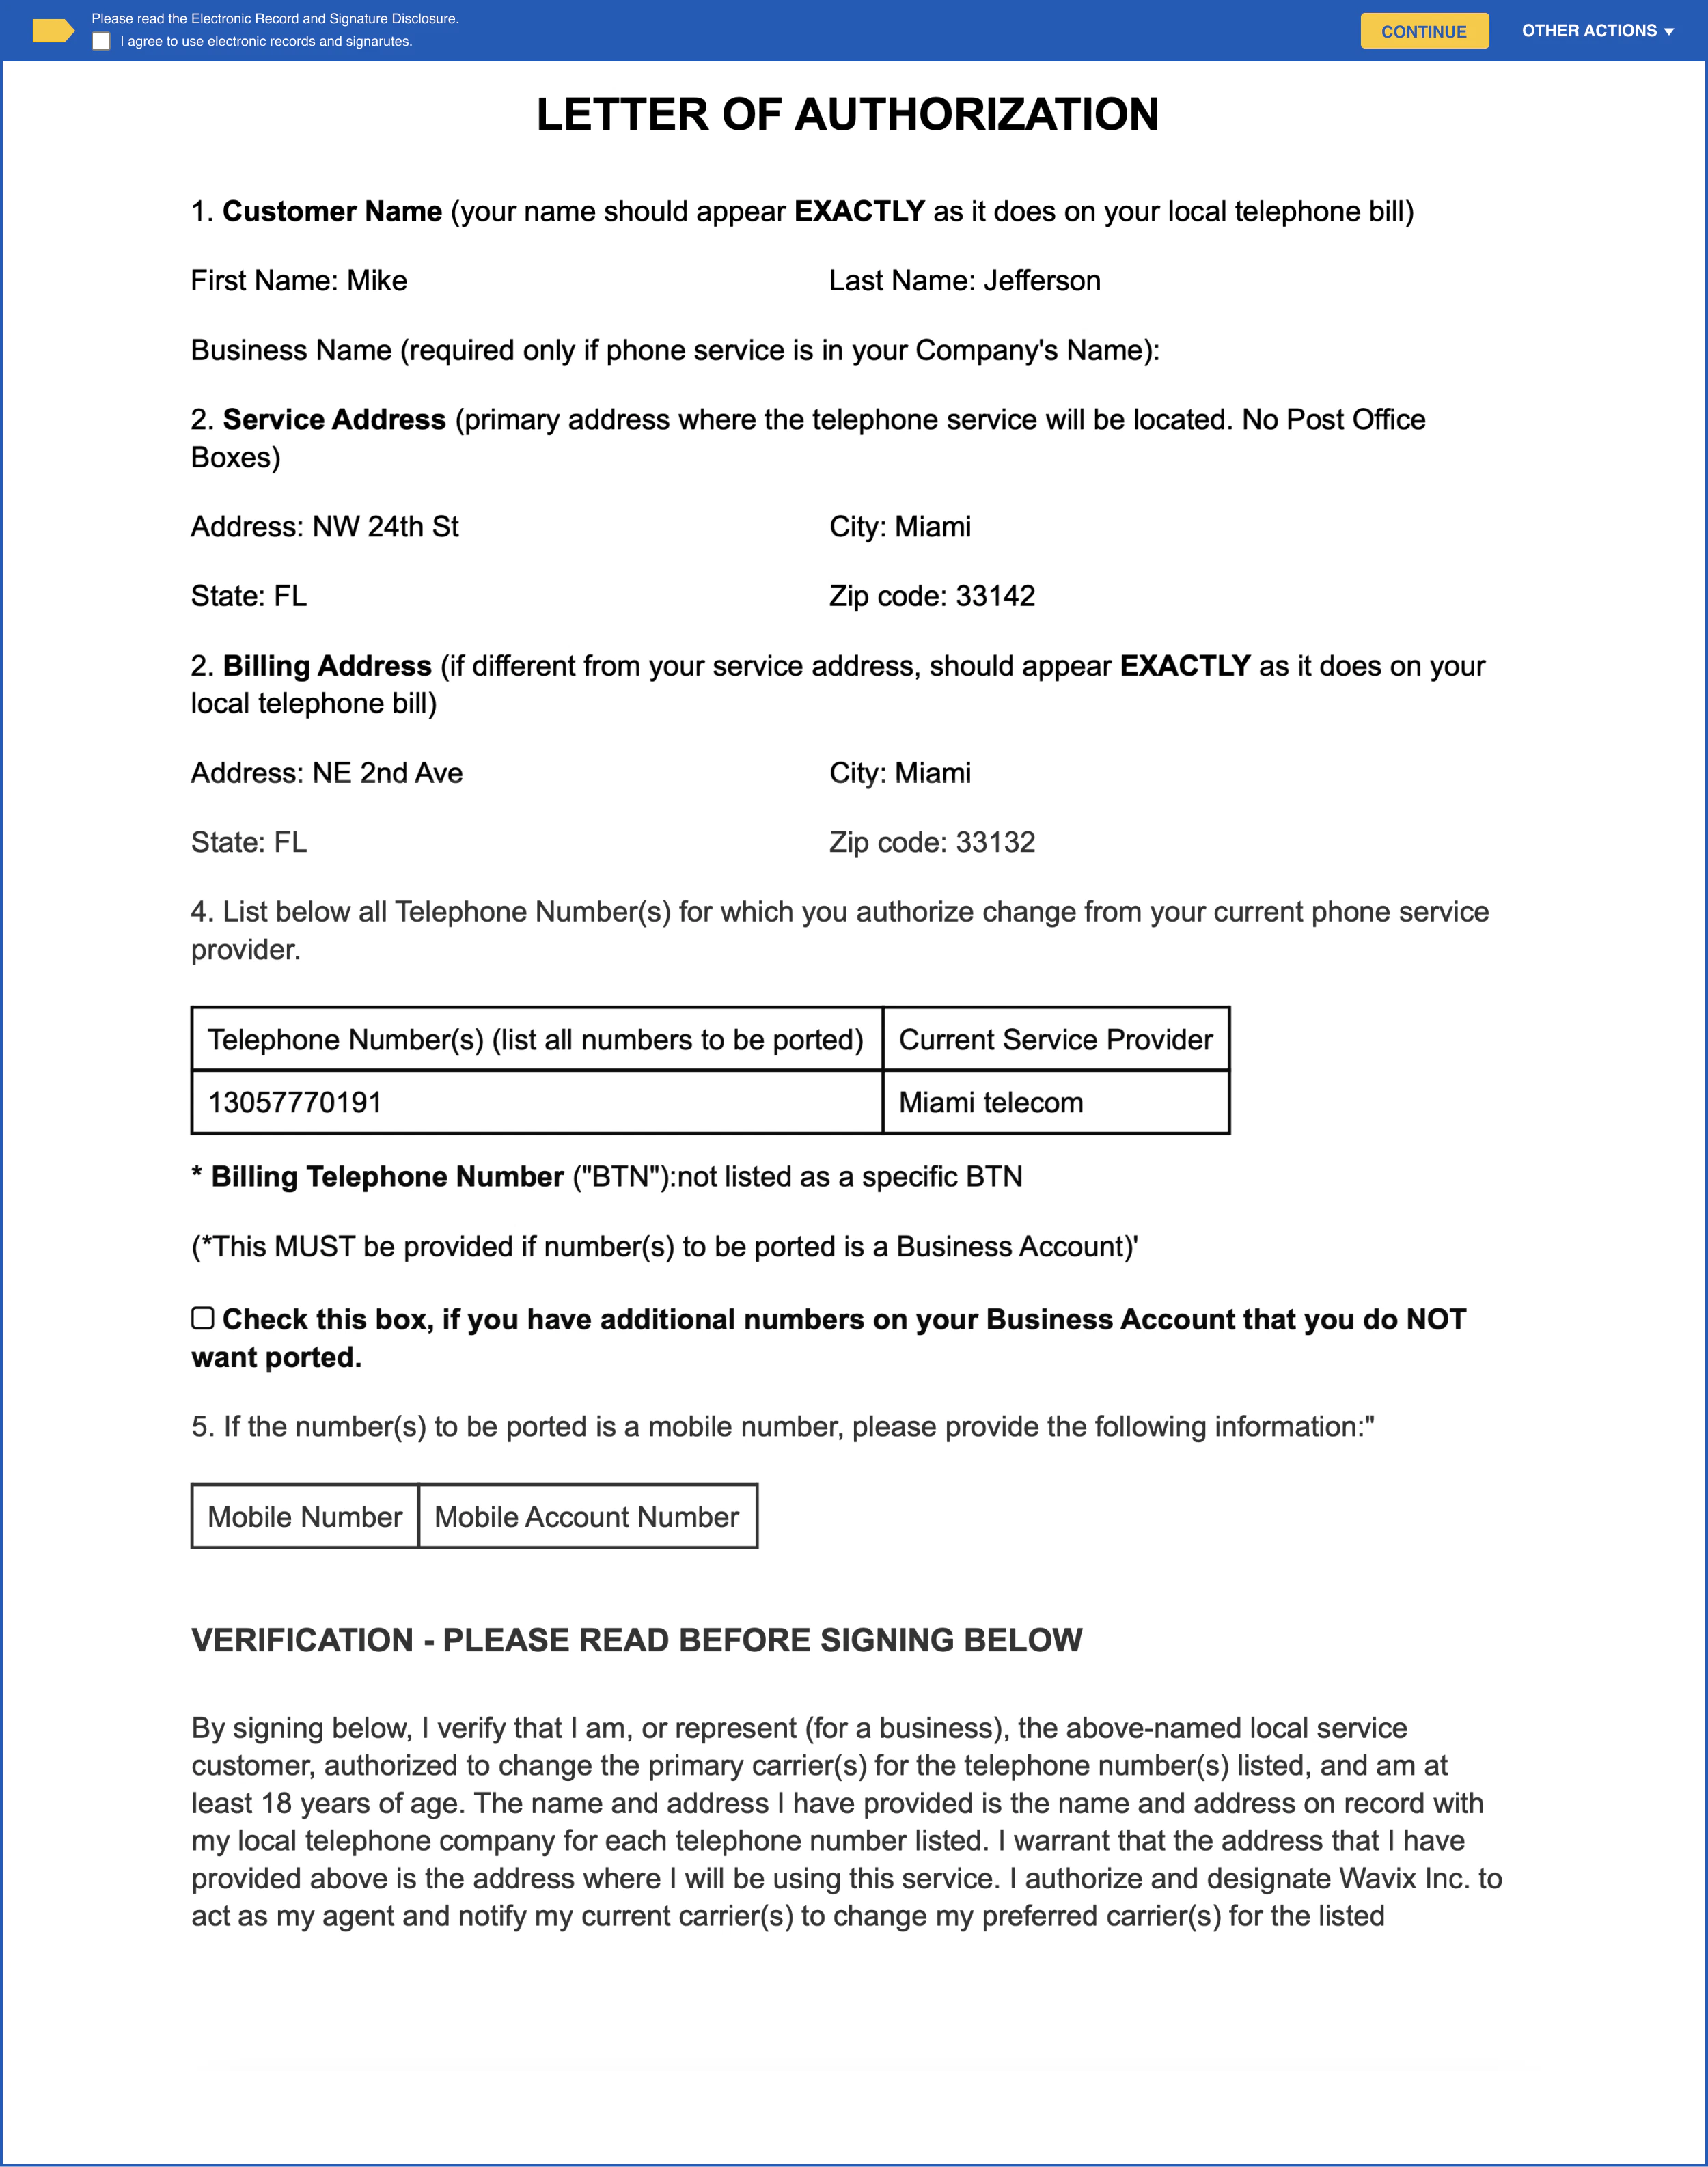
Review and digitally sign the Letter of Authorization (LOA).
Select **Next**.
Review and digitally sign the Letter of Authorization (LOA).
 Once you submit the request, you'll immediately receive an email notification with the **LNP order** number.
### Step 3: Authorize the port with your current provider
When you submit the port request in the Wavix portal, Wavix files a port order with your current carrier.
**What to expect:**
* You may receive an email from your current provider asking to confirm the port.
* If your carrier denies the port, Wavix will contact you with the reason.
* **You do not need to contact your current provider directly** unless they reach out to you.
### Step 4: Monitor your port status
To track the progress:
1. In the Wavix portal, go to **Numbers** → **Port Requests**
2. Find your port order by **Port Order Number** or **Phone Number**
3. View the current **Status** and **Timeline**:
If you don't see progress after 7 days, contact Wavix support with your Port Order Number.
### Step 5: Cutover and activation
The cutover is when your number officially switches to Wavix. Here's what happens:
**The day before cutover:**
* You'll receive a confirmation from Wavix with the cutover date and time.
* The Wavix team pre-provisions the number(s) to your Wavix account to ensure a smooth cutover.
* Plan to have a short testing window available (15-30 minutes).
* Inform your team that the number(s) will be briefly unavailable.
**During cutover:**
* Your number(s) will be temporarily unavailable for a few minutes.
* Calls and messages to the number(s) will fail briefly, then route to Wavix.
**Immediately after cutover:**
* You'll receive a confirmation from Wavix that the porting is complete.
* Your number(s) are now provisioned to your Wavix account.
**If something goes wrong:**
* Contact [Wavix Support](mailto:support@wavix.com) immediately with your **LNP order** number.
* Provide details about what's not working.
Once you submit the request, you'll immediately receive an email notification with the **LNP order** number.
### Step 3: Authorize the port with your current provider
When you submit the port request in the Wavix portal, Wavix files a port order with your current carrier.
**What to expect:**
* You may receive an email from your current provider asking to confirm the port.
* If your carrier denies the port, Wavix will contact you with the reason.
* **You do not need to contact your current provider directly** unless they reach out to you.
### Step 4: Monitor your port status
To track the progress:
1. In the Wavix portal, go to **Numbers** → **Port Requests**
2. Find your port order by **Port Order Number** or **Phone Number**
3. View the current **Status** and **Timeline**:
If you don't see progress after 7 days, contact Wavix support with your Port Order Number.
### Step 5: Cutover and activation
The cutover is when your number officially switches to Wavix. Here's what happens:
**The day before cutover:**
* You'll receive a confirmation from Wavix with the cutover date and time.
* The Wavix team pre-provisions the number(s) to your Wavix account to ensure a smooth cutover.
* Plan to have a short testing window available (15-30 minutes).
* Inform your team that the number(s) will be briefly unavailable.
**During cutover:**
* Your number(s) will be temporarily unavailable for a few minutes.
* Calls and messages to the number(s) will fail briefly, then route to Wavix.
**Immediately after cutover:**
* You'll receive a confirmation from Wavix that the porting is complete.
* Your number(s) are now provisioned to your Wavix account.
**If something goes wrong:**
* Contact [Wavix Support](mailto:support@wavix.com) immediately with your **LNP order** number.
* Provide details about what's not working.