> ## Documentation Index
> Fetch the complete documentation index at: https://docs.wavix.com/llms.txt
> Use this file to discover all available pages before exploring further.
# How to create a SIP trunk
> Step-by-step guide to creating and configuring a SIP trunk in the Wavix portal
A SIP trunk allows you to connect your IP-PBX or communications platform to the Wavix platform to make and receive calls. This guide walks you through the process of creating a SIP trunk in the Wavix portal.
## Create a SIP trunk in the Wavix portal
To purchase or configure a new SIP trunk:
1. **Sign in** to your [Wavix account](https://app.wavix.com).
2. In the top menu, click on **Numbers & Trunks → Trunks**.
3. Click **Create new**.
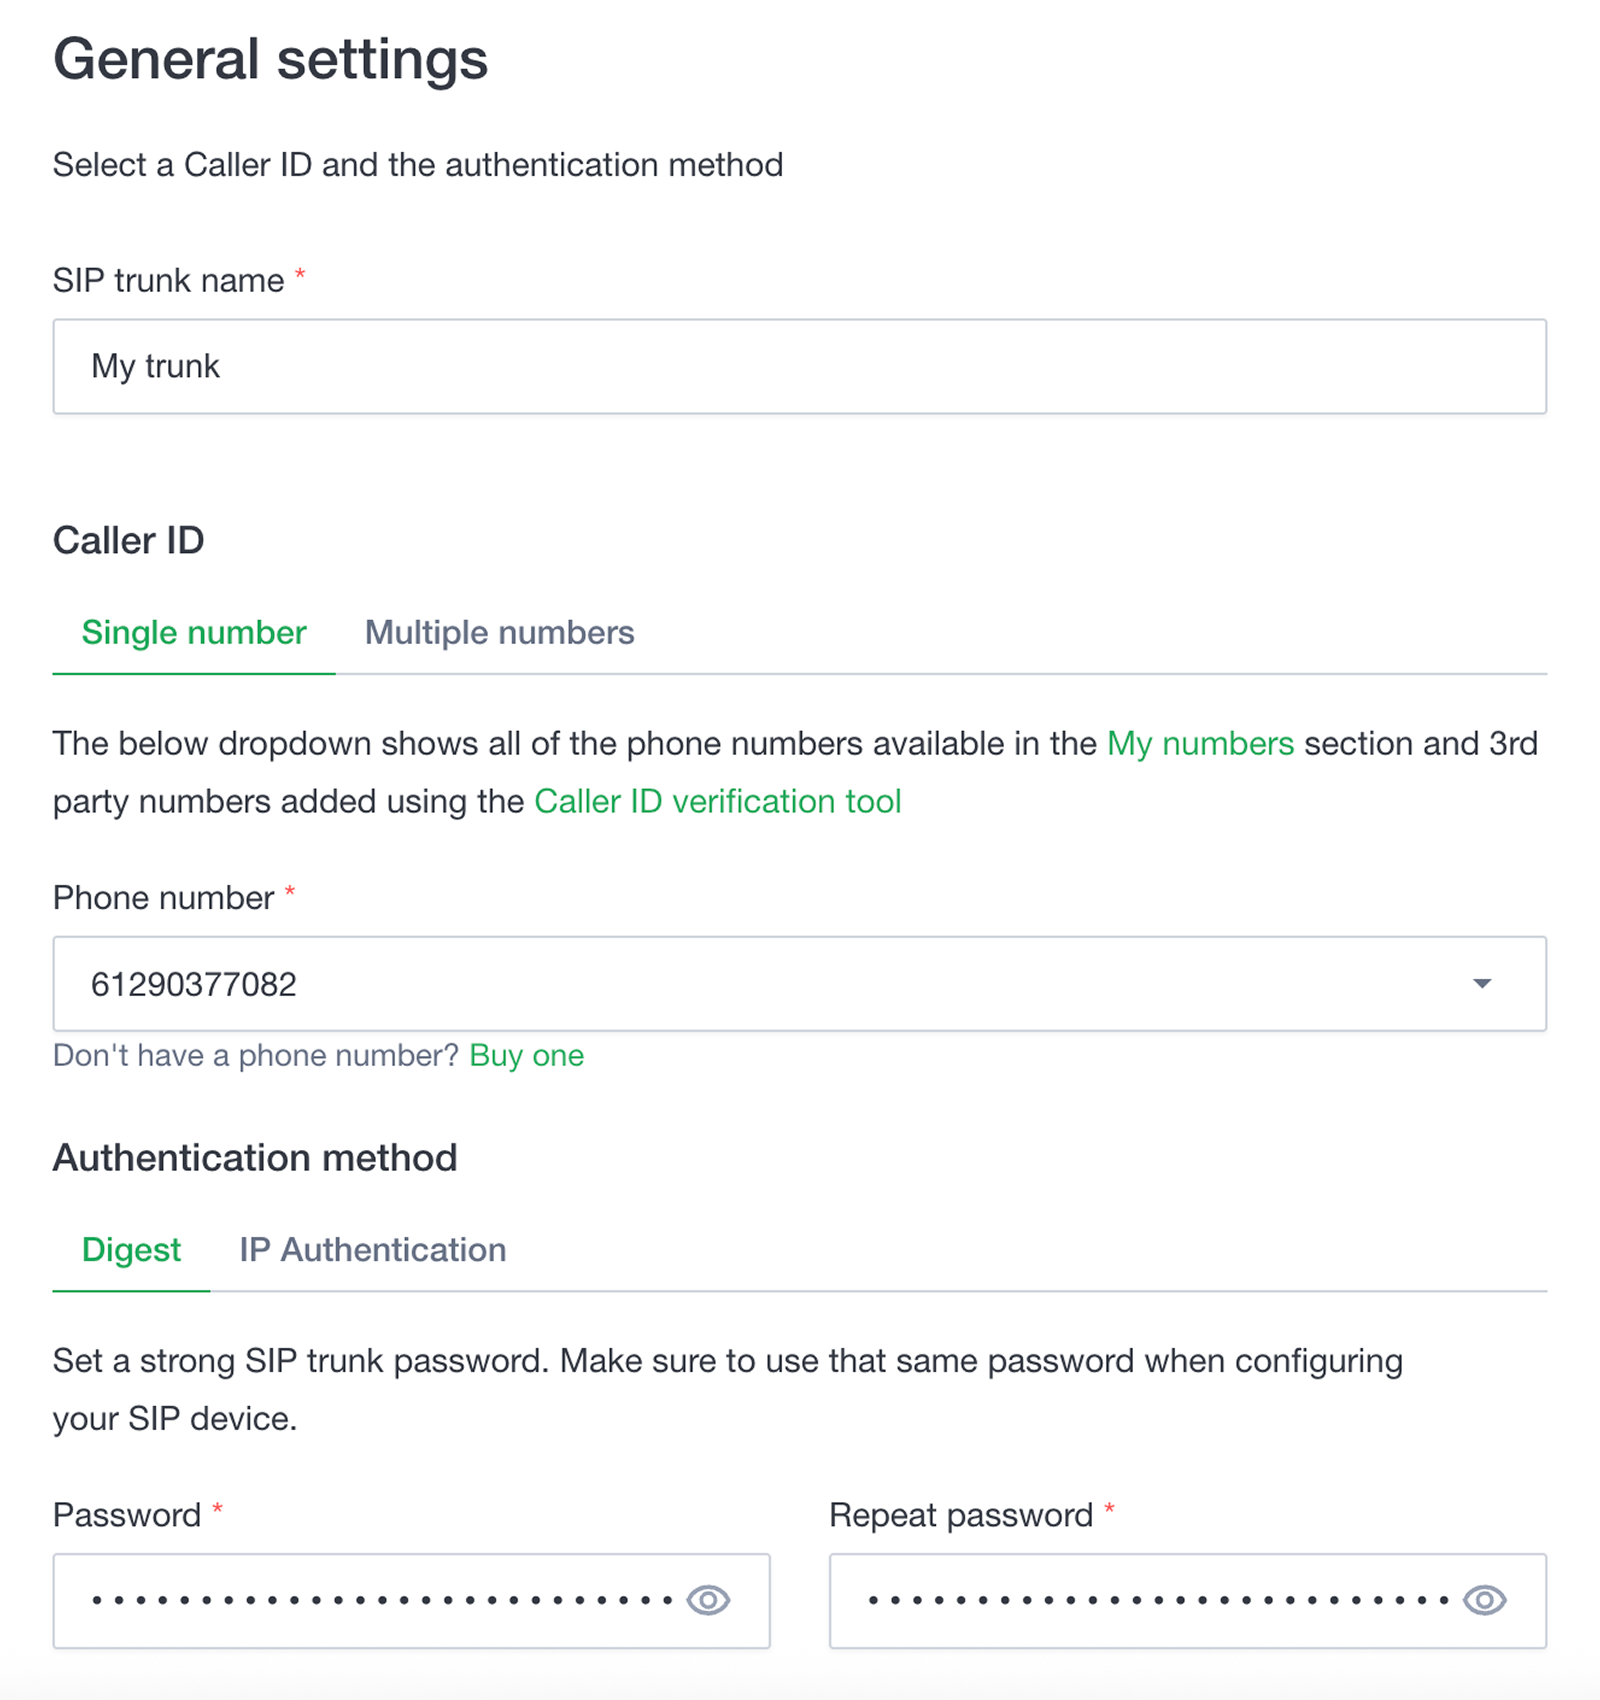
4. Under **Authentication Method**, select **Digest** (for username/password authentication) or **IP Authentication** (if you have a dedicated static IP).
5. Enter a **SIP trunk name**, set a **SIP trunk password** (for Digest only), and choose one of your numbers as the **Caller ID**.
6. (Optional) Configure additional limits. If not specified, global account limits apply:
* Max outbound call duration
* Max number of simultaneous calls via the SIP trunk
* Max call cost
7. (Optional) Under **Trunk features**, enable functionality like **Call recording**, **Call transcription**, or **Voicemail detection** (AMD).
8. Click **Save and close** (or **Next** to configure advanced options).
Once the SIP trunk is successfully created, it will appear in your account's SIP trunks list.
 Your 5-digit SIP trunk username is generated automatically and shown in the **SIP trunk ID** column.