
Buy a phone number from Wavix

Before placing or receiving a call, you need to have an active phone number on your Wavix account. If you already have one, you can skip this section.
  1. Sign in to your Wavix account.
  2. Click on Buy under Numbers & trunks in the top menu.
  3. Select the country and region where you wish to purchase a number.
  4. Choose one or more numbers and click Buy now.
  5. Review the Cart and complete checkout.
Some numbers require proof of local address or other documents before activation. Upload any requested documents and wait for the Wavix Provisioning team to approve them before the numbers become active.

Create a SIP Trunk at Wavix

  1. In the top menu, go to Numbers & Trunks → Trunks.
  2. Click Create new.
  3. Under Authentication Method, select Digest.
  4. Enter a SIP trunk name, set a SIP trunk password, and choose one of your numbers as the Caller ID.
  5. (Optional) Configure additional limits. If not specified, global account limits apply:
    • Max outbound call duration
    • Max number of simultaneous calls via the SIP trunk
    • Max call cost
  6. Click Create.
Once the SIP trunk is successfully created, it will appear in your account’s SIP trunks list. Configure SIP trunk screenshot
Your 5-digit SIP trunk username is generated automatically and shown in the SIP trunk ID column.

Configure Zoiper

1

Download and install Zoiper

Go to zoiper.com, download, and install the latest version.
2

Enter SIP trunk username and password

Enter your Wavix SIP trunk ID and password. Select Login.SIP username and password
3

Enter the host name

Enter the address of one of Wavix’s regional SIP proxies. Select Next.Wavix SIP gateway
Choose the gateway with the lowest ping from your location. See Wavix IP addresses for the full list of regional gateways.
4

Skip Authentication and Outbound proxy step

Wavix doesn’t require an authentication username. Select Skip.Zoiper Authentication and Outbound proxy
5

Wait for configuration test

Wait while Zoiper validates your configuration and tests the connection to Wavix. Select Next.Zoiper configuration test
6

Place a call

Close the Account settings, open a dialpad, and place a test call.Zoiper dialpad
All destination phone numbers must be in the E.164 international format. This format can handle numbers with up to 15 digits and is usually written as [+][country code][subscriber number including area code]. For example, a US number in E.164 format would be +16561223344. Wavix will reject calls to numbers without a country code or carrying national access codes.
CountryNumberReasonNumber in E.164 format
US6561223344No country code+16561223344
UK020 1122 3344No country code, national access code with leading 0+442011223344
Switzerland0041797000777Leading 00 international prefix+41797000777

Configure inbound calls

For calls to be routed to your Zoiper instance, follow these steps in your Wavix account:
  1. Sign in to your Wavix account
  2. Navigate to My numbers under Numbers & trunks in the top menu
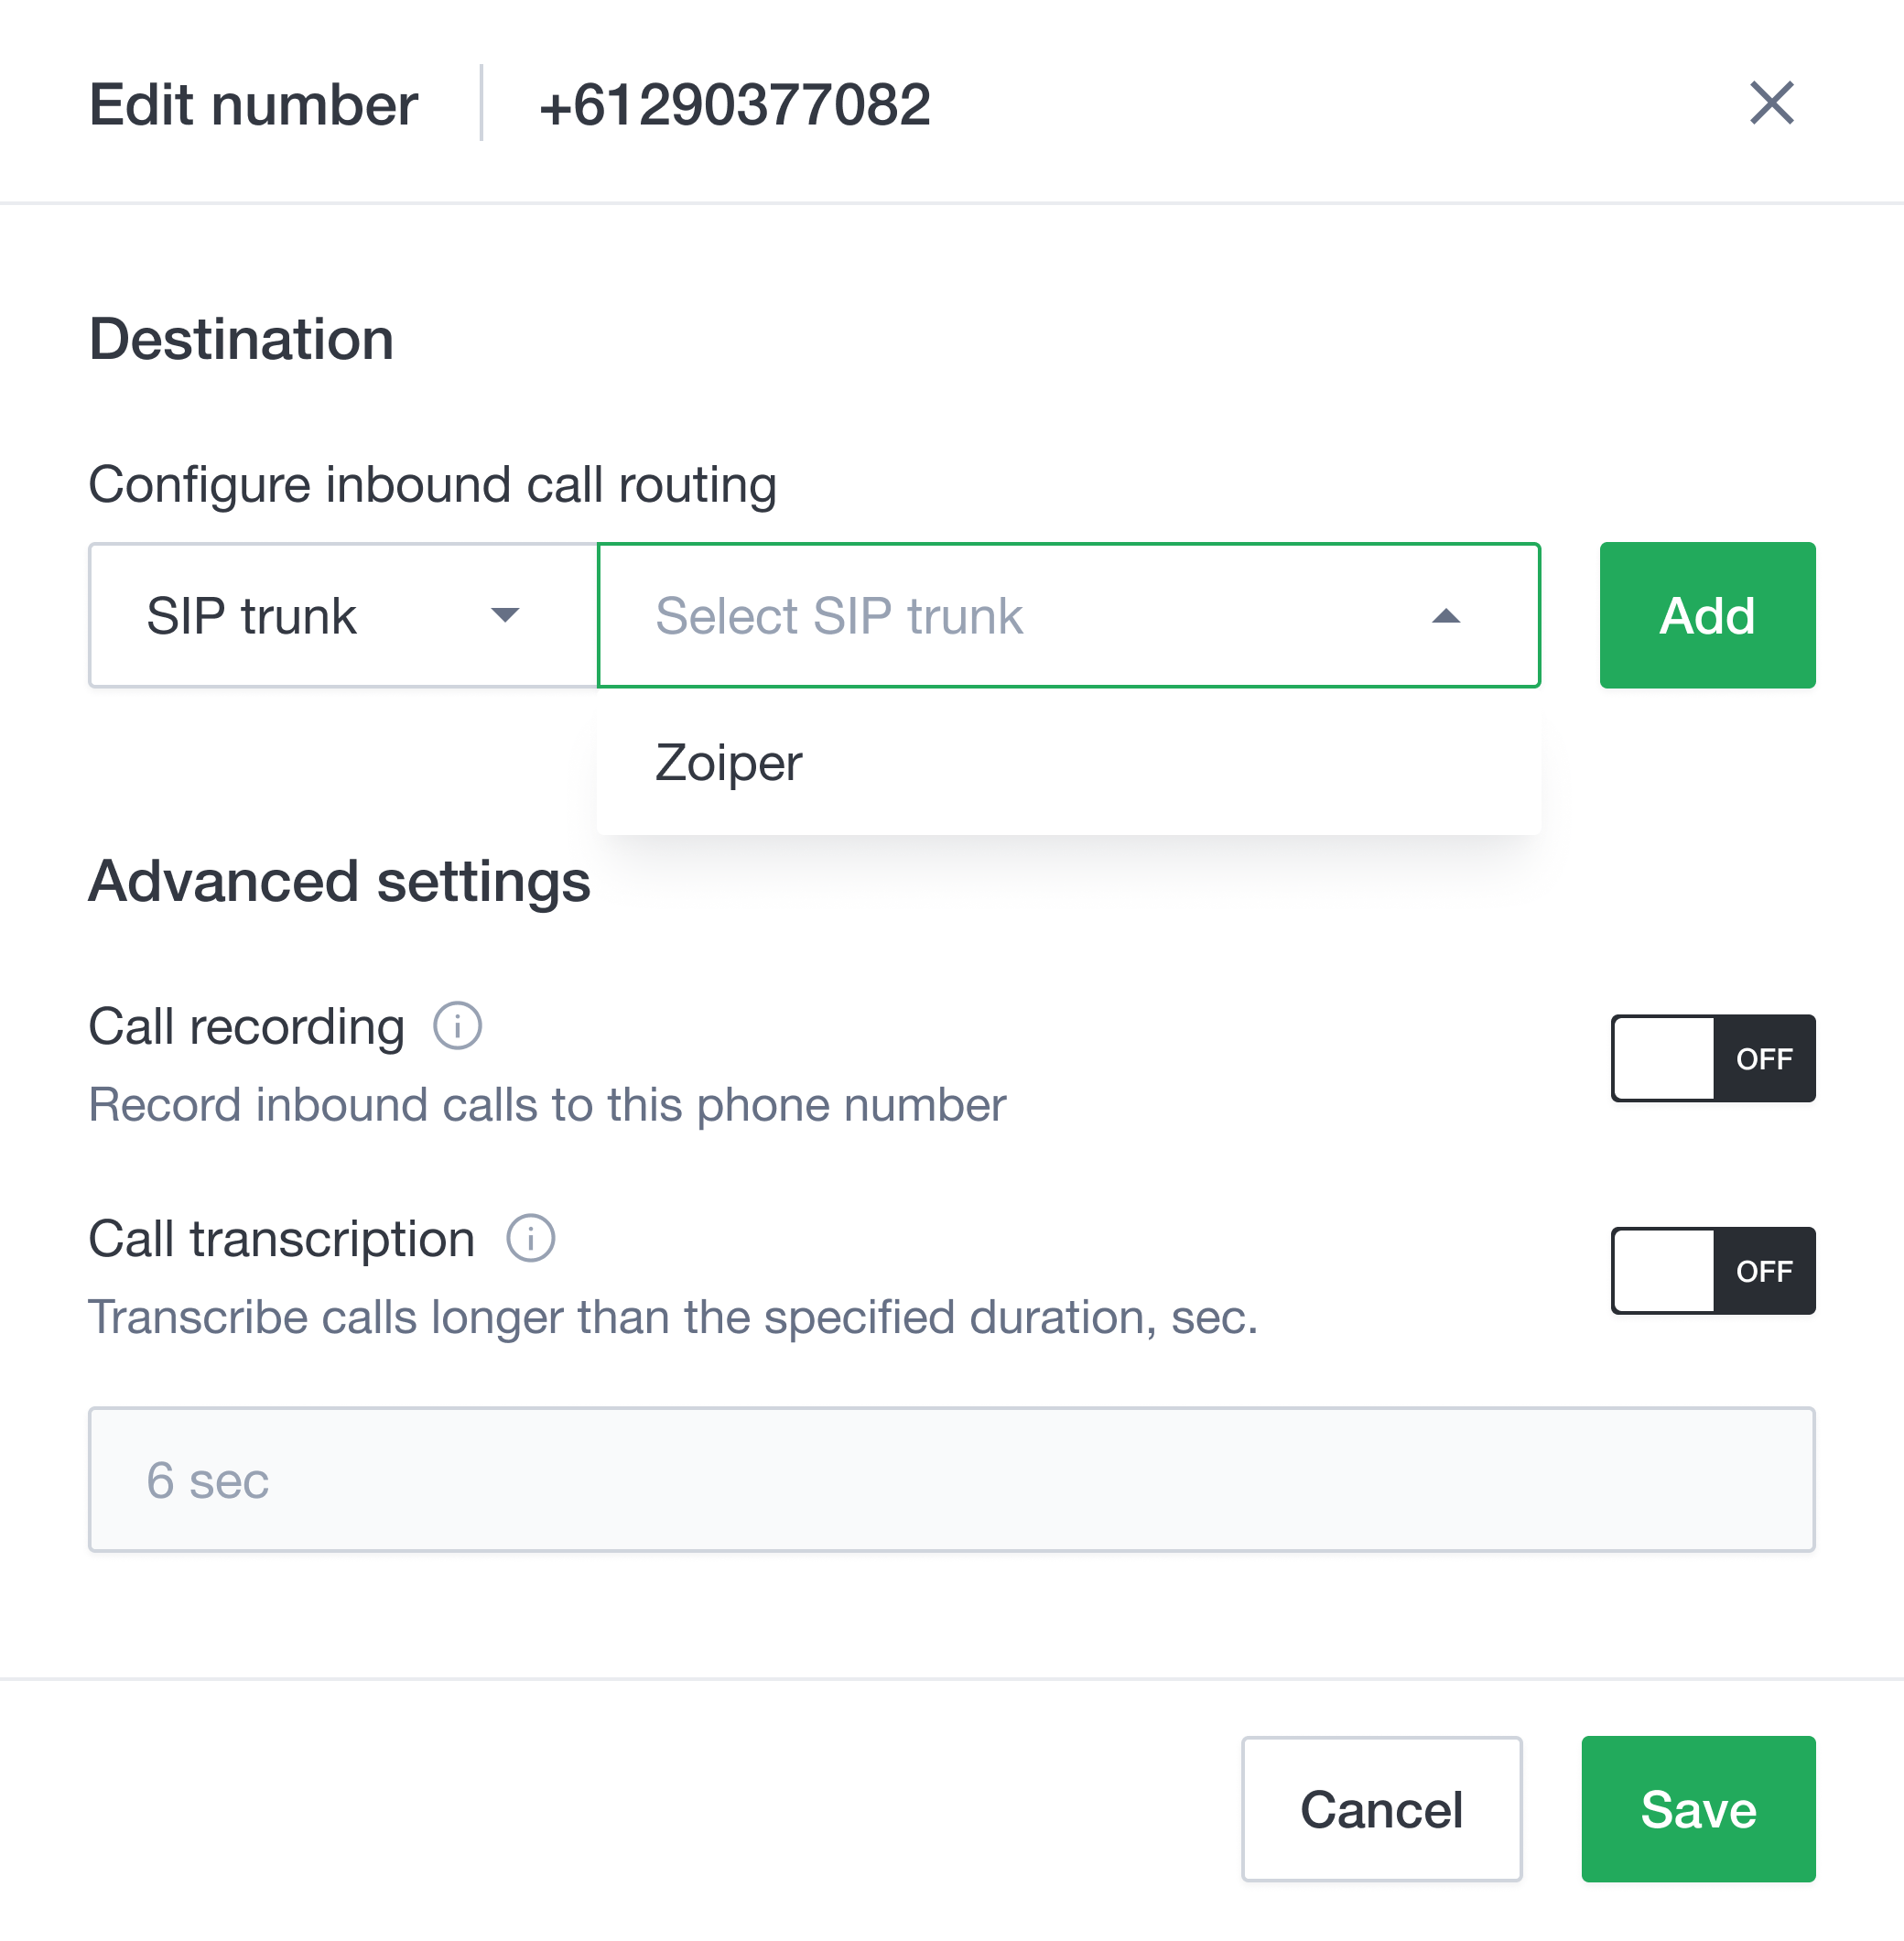
  3. Click on the three dots next to the number you want to edit (right-hand side) and select Edit number
  4. Select the destination trunk in the Destination section
  5. Click Add to add the destination for the phone number
  6. Click Save to apply the settings
Wavix phone number configuration You can also edit multiple numbers simultaneously. To do this, select the multiple numbers you want to modify, then click the Bulk actions button. The changes will apply to all selected numbers.